Quantcast
Channel: phpGrid – PHP Datagrid
Viewing all 107 articles
Browse latest View live

Save Data in Virtual Column

$
0
0

It’s possible to save data in virtual column to database.To save data in virtual column or calculated column back to database, you can use jqGridAddEditAfterSubmit event (FORM edit only) to post data to another script through a separate Ajax call. The catch is you need to supply your own save data script. Just iterate the $_POST variables and call appropriate functions to save posted data to database. Should be fairly simple to do.

Below is the code snippet. Replace “orders” with your own table name please. You need to implement save_virtual_column.php to save virtual column data to another page after submit through another Ajax call

jqGridAddEditAfterSubmit works only in FORM edit mode.
X
1
2
3
4
5
6
7
8
9
10
11
12
13
14
15
16
17
18
$afterSubmit = <<<AFTERSUBMIT
function (event, status, postData)
{
    selRowId = $("#orders").jqGrid ('getGridParam', 'selrow');
    virtual_data1 = $("#orders").jqGrid("getCell", selRowId, 'total');   // data in virtual column
    virtual_data2 = $("#orders").jqGrid("getCell", selRowId, 'foo');
    console.log('going to post virtual column data ' + virtual_data1 + ', ' + virtual_data2 + ' to another page through a separate AJAX call');
    $.ajax({ url: 'save_virtual_column.php',
        data: {v_data1: virtual_data1, v_data2: virtual_data2}, // replace customerNumber with your own field name
        type: 'post',
        success: function(output) {
                    alert(output);
                }
        });

}
AFTERSUBMIT
;
$dg->add_event("jqGridAddEditAfterSubmit", $afterSubmit);

The screenshot illustrates values in virtual columns named “total” and “foo” are saved after users submit form. It posts to a file named “save_virtual_column.php” with posted form data v_data1, v_data2.


save_virtual_column_data


This is also a good technique to save any other additional data to database because it does not require modifying edit.php. Note that jqGridAddEditAfterSubmit works only in FORM edit mode.

The post Save Data in Virtual Column appeared first on phpGrid.


Mobile Device Optimized

Math (e.g. Sum, Avg, Count) Operation

$
0
0

Math Operation
Math Operation

It’s possible to perform math operation on numeric columns with a little bit help from Javascript and “jqGridLoadComplete” event handler.

It’s important to set “footerrow” to true first.

PHP

1
$dg->set_grid_property(array("footerrow"=>true));

Javascript:

1
2
var colSum = $('#customers').jqGrid('getCol', 'creditLimit', false, 'sum'); // other options are: avg, count
$('#customers').jqGrid('footerData', 'set', { state: 'Total:', 'creditLimit': colSum });

The supported math operations are:

  • sum
  • avg
  • count

Complete Code Sample:

1
2
3
4
5
6
7
8
9
10
11
$dg = new C_DataGrid('SELECT customerName, city, state, creditLimit FROM customers', 'customerName', 'customers');
$dg->set_grid_property(array("footerrow"=>true));
$loadComplete = <<<LOADCOMPLETE
function ()
{
var colSum = $('#customers').jqGrid('getCol', 'creditLimit', false, 'sum'); // other options are: avg, count
$('#customers').jqGrid('footerData', 'set', { state: 'Total:', 'creditLimit': colSum });
}
LOADCOMPLETE
;
$dg->add_event("jqGridLoadComplete", $loadComplete);
$dg -> display();

See Live Example!

The post Math (e.g. Sum, Avg, Count) Operation appeared first on phpGrid.

Externalize Search

$
0
0
Externalize Search
Externalize Search

 
You can even externalize search fields without ever using phpGrid’s integrated or advanced search feature. It’s more work but you have the liberal to put the search box anywhere on the page.

This feature requires no PHP, only a little bit of HTML and Javascript. The filters are sent to server side via AJAX. It then reloads grid with filtered data without refreshing the entire page.

Below code snippet using “orders” table from the previous integrated search example.

HTML:

1
2
3
4
5
6
7
<fieldset id="SearchPanel"><legend>Search</legend>Status <input id="status" type="text" placeholder="Enter status" />
<select id="op">
<option value="AND">AND</option>
<option value="OR">OR</option>
</select>
Customer # <input id="customerNumber" type="text" placeholder="Enter customer number" />
<button id="searchbtn"> Search</button></fieldset>

JavaScript:

1
2
3
4
5
6
7
8
9
10
11
function searchGrid(){
phpGrid_orders.setGridParam({
postData: {
filters:'{"groupOp":" '+ $("#op").val() +' ","rules":['+
'{"field":"status","op":"cn","data":"' + $("#status").val() +'"}'+
',{"field":"customerNumber","op":"cn","data":"'+ $("#customerNumber").val() +'"}]}'
},
"search":true,
page:1
}).trigger("reloadGrid");
}

The search operan can have one of the following values:

  • eq: Equals
  • ne: Not Equals
  • lt: Less than
  • le: Less than or Equal
  • gt: Greater than
  • ge: Greater than or Equal
  • cn: Contains
  • nc: Does not Contain
  • bw: Begins With
  • bn: Not Begins With
  • ew: Ends With
  • en: Not Ends With

 
See Live Example!

The post Externalize Search appeared first on phpGrid.

Multiple Fields Global Search *

$
0
0

* Please note global search feature is only available in Enterprise edition and above.

Multiple Fields Global Search

 
In phpGrid, we always try to make PHP developer’s life easier. So we made global search super simple! A single function call enable_global_search() enables global search on any searchable columns. You can search in one or more searchable columns. Multiple search terms can be separated by space.

Like the externalize search demo, the search returns data from server side through AJAX and subsequently reloads the grid with newly filtered data without reloading the entire page, except this time is only one line code. No bull.


1
2
3
$dg = new C_DataGrid("SELECT * FROM orders", "orderNumber", "orders");
$dg -> enable_global_search(true);
$dg -> display();

 
See Live Example!

The post Multiple Fields Global Search * appeared first on phpGrid.

enable_global_search() *

$
0
0

* Please note this feature is only available in Enterprise & higher edition.

  • Parameters:
    • $enable: true or false
  • Description:
    • Enables multi-fields global search on any searchable columns. When set to true, search can perform in one or more searchable columns. Multiple search terms are separated by space.
  • Example:
1
$dg -> enable_global_search(true);

The post enable_global_search() * appeared first on phpGrid.

Work With Different Databases

$
0
0

You should specific PHPGRID_DB_TYPE value in conf.php. It can be one of the following strings. The default database type for phpGrid is “mysql”. PHPGRID_DB_TYPE value is case sensitive.

Refer to installation documentation for detailed instruction on conf.php.


PHPGRID_DB_TYPE Description
mysql MySQL (default)
odbc_mssql SQL Server (*nix Only)
odbc_mssql_native SQL Server Windows native (Download PHP SQL Server Driver)
oci805 Oracle (Got TNS?)
postgres PostGreSql
access Microsoft Access
db2 DB2
db2-dsnless DB2 DSN-less connection
informix Informix
informix72 Alternative Informix Driver
ibase Firebird/InterBase
odbc Generic ODBC


phpGrid also supports local array data source without using a database.

The post Work With Different Databases appeared first on phpGrid.

Local Array Data Source *

$
0
0

* Local array data source currently is only available to phpGrid Enterprise and higher.


phpGrid now supports local array data source (version 5.5+). No database is required for local data. So it’s NOT necessary to define PHPGRID_DB_* variables in conf.php when using local array. Simply pass a PHP array as the first parameter to the phpGrid constructor. Everything else is virtually the same.

In the below example, the first segment creates a local PHP array, namely $data1, will be used as the data source for phpGrid. The second segment demonstrates passing the $data1 to the phpGrid constructor and call its methods. All existing phpGrid methods can be used the same way as a database-driven datagrid*.

Make sure to check out the live example!

Local Array (PHP)

1
2
3
4
5
6
7
8
9
10
11
12
13
14
$name = array('Bonado', 'Sponge', 'Decker', 'Snob', 'Kocoboo');
for ($i = 0; $i &lt; 200; $i++)
{
$data1[$i]['id'] = $i+1;
$data1[$i]['foo'] = md5(rand(0, 10000));
$data1[$i]['bar1'] = 'bar'.($i+1);
$data1[$i]['bar2'] = 'bar'.($i+1);
$data1[$i]['cost'] = rand(0, 100);
$data1[$i]['name'] = $name[rand(0, 4)];
$data1[$i]['quantity'] = rand(0, 100);
$data1[$i]['discontinued'] = rand(0, 1);
$data1[$i]['email'] = 'grid_'. rand(0, 100) .'@example.com';
$data1[$i]['notes'] = '';
}

phpGrid Code ($data1 is the local array created above)

1
2
3
4
5
6
7
8
9
10
11
12
13
14
15
16
17
18
19
20
21
22
23
24
25
26
27
28
29
30
31
32
33
$dg = new C_DataGrid($data1, "id", "data1");
$dg->set_col_title("id", "ID")->set_col_width('id', 20);
$dg->set_col_title("foo", "Foo");
$dg->set_col_title("bar", "Bar");
$dg->set_col_title('discontinued', 'disc.')->set_col_width('discontinued', 35);
$dg->set_col_align('cost', 'right')->set_col_currency('cost', '$');
$dg->set_col_width('bar1', 40);
$dg->set_col_width('quantity', 220);
$dg->set_row_color('lightblue', 'yellow', 'lightgray');
$dg->enable_search(true);
$dg->enable_edit('FORM', 'CRUD');
$dg->enable_export('EXCEL');
$dg->enable_resize(true);
$dg->set_col_format('email', 'email');
$dg->set_col_dynalink('name', 'http://example.com', array("id", "name"));
$dg->set_caption('Array Data Test');
$dg->set_col_hidden('bar2');
$dg->set_col_property('notes', array('edittype'=>'textarea','editoptions'=>array('cols'=>40,'rows'=>10)))->set_col_wysiwyg('notes');
$dg->set_dimension(900, 400);
//$dg->set_multiselect(true);

$dg->set_conditional_value('discontinued', '==1',  array("TCellStyle"=>"tstyle"));
$dg->set_conditional_format("cost","CELL",array("condition"=>"lt","value"=>"20.00","css"=> array("color"=>"black","background-color"=>"yellow")));

$dg->set_theme($theme_name);

// set data sort type. With data array, we don't have data type information as we usually do with database fields.
$dg -> set_col_property("quantity",  array("sorttype"=>"integer"));  // display different time format
$dg -> set_col_property("cost",  array("sorttype"=>"currency"));  // display different time format

$dg->set_databar('quantity', 'blue');

$dg->display();

Screenshot

local_array

* Note that master detail, subgrid, export and file uploads are not yet available when using local array data source.

See Live Example!


JSON Data Source

It’s also possible to use JSON string as a data source with one extra step: use json_decode and set the second parameter to true to return the decoded JSON string to an associative array.

Once you have the array, it can be passed to the phpGrid constructor as if it’s a local array data source. This is useful when your data is real-time or loaded from a remote source such as stock quote and RSS etc.

1
2
3
4
5
6
$url = "http://myurl.com/json_string";
$json = file_get_contents($url);
$json_output = json_decode($json, true);

$dg = new C_DataGrid($json_output['items'], "id", "items");
$dg->display();

Save local array back to datbase

It’s possible to save local array data back a relatiional DB. The technique uses local array as indirect mean to edit complex database query with JOINS, UNION and etc. See KB: Save local array back to database via Ajax

Demo

The post Local Array Data Source * appeared first on phpGrid.


phpGrid, Twitter Bootstrap Integration

$
0
0
Run Demo


This is a step-by-step tutorial of how to integrate SmartAdmin, or any other Bootstrap them, with phpGrid.

SmartAdmin is a popular Bootstrap admin theme. It has modern flat design and responsive layout. SmartAdmin comes with 5 different versions: Pure HTML, AJAX Version, PHP version, Modular AngularJS, and ASP.NET MVC5 versions. For this example, we use PHP version, and specifically, the PHP Ajax version.


What you will need

  1. Acquire a copy of phpGrid. You can use either the free, phpGrid Lite or get phpGrid full version here.
  2. Get Bootstrap SmartAdmin. Many Bootstrap themes are also available for free on the Internet.

Now that you’ve downloaded both, let’s get started.


1. Folder Structure

As mentioned earlier, we will use SmartAdmin’s PHP version. InsidePHP_version folder, you will find two subfolders, PHP_Ajax_version andPHP_HTML_version. Here, only PHP_Ajax_version folder is copied to web root directory and renamed as smartAdmin_AJAX (see below).

Secondly, save our phpGrid folder in smartAdmin_AJAX as shown. However, you can save it to any folder.


phpgrid bootstrap folder structure


2. Update phpGrid conf.php

Before you begin coding using phpGrid, you must specify database information in conf.php, phpGrid configuration file in which we specify the following values:

  1. Database connection information,
  2. SEVER_ROOT,
  3. THEME

It’s important that we set THEME value as “NONE”. The reason is that we don’t need to provide a jQuery UI theme as Bootstrap already includes a theme. Using two jQuery themes will likely result in CSS conflicts and style inconsistency.

To learn more about phpGrid configuration, read the installation guide:http://phpgrid.com/documentation/installation/

For the purposes of this demo, we will use a MySQL database. In the figure below, you can see an example of the necessary database definitions as they appear in conf.php.

1
2
3
4
5
6
7
8
9
10
11
12
13
14
15
<?php
define('PHPGRID_DB_HOSTNAME', 'localhost:3306');
define('PHPGRID_DB_USERNAME', 'root');    
define('PHPGRID_DB_PASSWORD', '');
define('PHPGRID_DB_NAME', 'sampledb');
define('PHPGRID_DB_TYPE', 'mysql');  
define('PHPGRID_DB_CHARSET','utf8');
define('SERVER_ROOT', '/smartAdmin_AJAX/phpGrid');
define('THEME', 'NONE');
// *** MUST SET TO FALSE WHEN DEPLOYED IN PRODUCTION ***
define('DEBUG', false);
/******** DO NOT MODIFY ***********/
require_once('phpGrid.php');    
/**********************************/
?>

3. Edit Bootstrap lib/config.php

phpGrid requires PHP SESSION. To ensure that the PHP session starts properly, open the file config.php on the SmartAdmin_AJAX/lib/ directory and copy and paste the following text at the very top of the file.

1
if (session_id() == ''){ session_start();}

phpgrid bootstrap session


The setup process is now complete.


4. Insert PHP Grid

In this demo, we will add a reference call to phpGrid directly in SmartAdminajax/dashboard.php. . This call can be in any file in SmartAdmin ajax folder.

1
2
3
4
5
6
7
8
9
10
<?php
 require_once(../phpGrid/conf.php”);
 $dg = new C_DataGrid(“SELECT * FROM orders”, “orderNumber”, “orders”);
 $dg->enable_search(true);
 $dg->enable_export(‘EXCEL’);
 $dg->enable_edit(‘INLINE’);
 $dg->set_col_hidden(‘comments’);
 $dg->set_col_edittype(“status”, “select”, “Shipped:Shipped;Canceled:Cancelled;Open:Open;Pending:Pending”); $dg->enable_autowidth(true);
 $dg->display();
 ?>

Note the first line that references phpGrid/conf.php.

“orders” is a database table name from our MySQL sample database. You can find the sample MySQL sample database inside phpGrid/examples/SampleDBfolder.

Now visit the following URL to play around with your newly created PHP grid by using functions such as CRUD, search, and export! You can find a complete list of phpGrid demo here.

1
http://<YOUR WEB SERVER>/smartAdmin_AJAX/


5. Add Custom CSS (Optional)

At this point, the installation is complete. However, I refined jqGrid CSS so the final result would be more aesthetically pleasing. Here’s the final version of the CSS. Feel free to use this code on your page.

1
2
3
4
5
6
7
8
9
10
11
12
13
14
15
16
17
18
19
20
21
22
23
24
25
26
27
<style>
 /* phpGrid to re-expand 100%. Needed when page is loaded in Ajax and there’s sidebar */
 div.ui-jqgrid.ui-widget.ui-widget-content.ui-corner-all{
 width: 100% !important;
 overflow: auto;
 }
/* prevent Bootstrap CSS conflict by reseting phpGrid header CSS */
 .ui-jqgrid .ui-jqgrid-htable th div {
 position: inherit;
 height: initial;
 }
.ui-jqgrid .ui-jqgrid-view input, .ui-jqgrid .ui-jqgrid-view select, .ui-jqgrid .ui-jqgrid-view textarea, .ui-jqgrid .ui-jqgrid-view button {
 width: 100%;
 height: 100%;
 padding:0px;
 }
/* FORM edit */
 .ui-jqdialog-content table.EditTable input{
 width: 90%;
 }
 .ui-jqdialog-content table.EditTable select{
 width: 95%;
 }
 .ui-jqdialog-content table.EditTable textarea{
 width:90%;
 }
 </style>

That’s it. You now have a fully functional and great-looking, responsive PHP grid in your Bootstrap. And it also works great on mobile devices!


phpGrid Bootstrap is mobile friendly.


The post phpGrid, Twitter Bootstrap Integration appeared first on phpGrid.

phpGrid Laravel Integration

$
0
0

This is a step-by-step tutorial of how to integrate Laravel PHP framework with phpGrid.

Laravel is a free, open-source PHP web application framework, architected in model–view–controller (MVC) pattern. phpGrid is a standalone CRUD component encapsulating all necessary server and client side scripts and does not require Laravel packaging system for managing dependency.

System Requirements:

  • Laravel 4
  • PHP >= 5.4 (required by Laravel)
  • MCrypt PHP Extension (also required by Laravel)
  • phpGrid Lite (free)
  • Relational Database, e.g. MySQL

Laravel requires PHP version 5.4+ and MCrypt PHP Extension. Check your phpinfo to verify PHP version and MCrypt. In tutorial, we will be using free phpGrid Lite version.

php mcrypt


Set up Laravel:

The easiest way is to install Laravel is to use Composer.  However, installation procedure is outside the scope of this tutorial. Please visit http://laravel.com/docs/ for Laravel installation process. For the demo, we install Laravel folder in web server root directory.


phpGrid Folder Location in Laravel:

It’s common to save third-party libraries to Laravel “app/libraries”. However, the correct place to put phpGrid is actually in Laravel “public” folder. This is because phpGrid is more than jus the eback-end PHP classes but also contains front-end user accessible stylesheets and javascript to render datagrid. Such library must reside in the application’s “public” directory because Laravel public directory is the root directory that is accessible to users when they visit your website.

phpgrid-laravel-folder

phpGrid conf.php

You would need to setup the database connection and script path information in file “conf.php”. Since phpGrid resides in “public” folder, Laravel’s front-end root directory, phpGrid SERVER_ROOT value should be “/phpGrid_Lite”. Pay attention to the beginning slash character.

Learn more about SERVER_ROOT and rest of phpGrid system variables here.

1
define('SERVER_ROOT', '/phpGrid_Lite');

Laravel views:

Finally, one must create a view file in Laravel “app/views” folder. Since phpGrid is located in Laravel “public” folder, we can reference path to conf.php with Laravel’s public_path() helper function.

1
2
3
4
5
require_once(public_path() ."/phpGrid_Lite/conf.php");

$dg = new C_DataGrid("SELECT * FROM orders", "orderNumber", "orders");
$dg->enable_edit("INLINE", "CRUD");
$dg->display();

Note that “orders” is a database table from phpGrid sample database.


phpgrid-laravel-demo

The post phpGrid Laravel Integration appeared first on phpGrid.

phpGrid, Laravel 5 and Bootstrap 3

$
0
0

phpgrid-laravel5-bootstrap3-full-edit

Run Demo


Introduction

 
This tutorial walkthrough Laravel 5 and Bootstrap 3 theme integration first, then add PHP datagrid. If you have Laravel and Bootstrap theme already up running, you can skip to “Create “dashboard.blade.php” Child Template View”.
 

Install Laravel 5 (with Composer)

 
Let’s get started right away. Laravel 5 has the following system requirements. Please note that the Laravel 5 system requirements apply to both the web and the command line. The possibility is that you could be running different versions of PHP in command line and on web server. If that’s the case, fix your php alias to point to the same php executable. Lastly, acquire a copy of phpGrid from download page for later use.

  • PHP >= 5.4
  • Mcrypt PHP Extension
  • OpenSSL PHP Extension
  • Mbstring PHP Extension
  • Tokenizer PHP Extension

It’s highly recommended to use Composer to install Laravel. Laravel, by itself, does not packed with any third party libraries in order to keep it lightweight.  It instead relies on Composer for managing dependency. You can learn more on how to install Composer here.

To install Laravel, in command line, traverse to web root (e.g. /www), and execute the following command:

1
#composer create-project laravel/laravel --prefer-dist

Lastly, Laravel requires some permissions to be configured: folders within storage and vendor require write access by the web server.

laravel5-folder-permission


Laravel, AdminLTE Integration


In previous phpGrid Bootstrap integration tutorial, we used Bootstrap SmartAdmin theme. In this tutorial,  instead, we will use a different Bootstrap Admin theme called “AdminLTE“. It’s an excellent and free Bootstrap 3 admin theme created by @Almasaeed2010. You can preview it at https://almsaeedstudio.com/AdminLTE.

Technically, AdminLTE can work even without Laravel framework. The benefit to integrate it with Laravel is that we can take advantage of MVC routing and views, ultimately result in cleaner, and more importantly, scalable code. The downside is that one must edit each AdminLTE page to covert it to Laravel views, preferably using Blade template. All Blade templates have file extension “.blade.php”.


Convert AdminLTE “starter.html” to Laravel View


In this tutorial, we will covert AdminLTE’s default “starter.html” to Laravel views to host our PHP datagrid.

  1. Download AdminTLE from almsaeedstudio.com, extract, copy folders “bootstrap”, “dist”, “plugins”, and file “starter.html” to “public” folder. “starter.html” will be used as our starting point to create view.laravel5-adminlte-integration
  2. Create a new view named “admin.blade.php” with content copied from “starter.html” we had eariler. Save the new view in “resources/views”. It will be the admin default layout Blade template later can be extended. Note that all Blade templates should use the “.blade.php” extension.convert-admin-views
  3. We now need to further slice admin.blade.php so that it contents reusable sub-views. Create a new folder under “resource/views” called “includes”. It will store admin sub-views.

    phpgrid-laravel5-bootstrap3-includes-subviews

  4. Move <header> section as a new view as header.blade.php. Change any hyperlink or file reference to use Laravel “asset” help function (http://laravel.com/docs/4.2/helpers). Save it “includes” folder.
    1
    2
    3
    4
    5
    6
    7
    8
    9
    10
    11
    12
    13
    14
    15
    16
    17
    18
    19
    20
    21
    22
    23
    24
    25
    26
    27
    28
    29
    30
    31
    32
    33
    34
    35
    36
    37
    38
    39
    40
    41
    42
    43
    44
    45
    46
    47
    48
    49
    50
    51
    52
    53
    54
    55
    56
    57
    58
    59
    60
    61
    62
    63
    64
    65
    66
    67
    68
    69
    70
    71
    72
    73
    74
    75
    76
    77
    78
    79
    80
    81
    82
    83
    84
    85
    86
    87
    88
    89
    90
    91
    92
    93
    94
    95
    96
    97
    98
    99
    100
    101
    102
    103
    104
    105
    106
    107
    108
    109
    110
    111
    112
    113
    114
    115
    116
    117
    118
    119
    120
    121
    122
    123
    124
    125
    126
    127
    128
    129
    130
    131
    132
    133
    134
    135
    136
    137
    138
    139
    140
    141
    142
    143
    144
    <!-- Main Header -->

    <header class="main-header"><!-- Logo -->
    <a class="logo" href="index2.html">
    <!-- mini logo for sidebar mini 50x50 pixels -->
    <span class="logo-mini"><b>A</b>LT</span>
    <!-- logo for regular state and mobile devices -->
    <span class="logo-lg"><b>Admin</b>LTE</span>
    </a>

    <!-- Header Navbar -->

    <nav class="navbar navbar-static-top"><!-- Sidebar toggle button-->
    <a class="sidebar-toggle" href="#" data-toggle="offcanvas">
    <span class="sr-only">Toggle navigation</span>
    </a>
    <!-- Navbar Right Menu -->
    <div class="navbar-custom-menu">
    <ul class="nav navbar-nav">
    <ul class="nav navbar-nav"><!-- Messages: style can be found in dropdown.less-->
        <li class="dropdown messages-menu"><!-- Menu toggle button -->
    <a class="dropdown-toggle" href="#" data-toggle="dropdown">
    <i class="fa fa-envelope-o"></i>
    <span class="label label-success">4</span>
    </a>
    <ul class="dropdown-menu">
        <li class="header">You have 4 messages</li>
        <li><!-- inner menu: contains the messages -->
    <ul class="menu">
    <ul class="menu">
        <li><!-- start message -->
    <div class="pull-left"><!-- User Image -->
    <img class="img-circle" src="{{ asset('dist/img/user2-160x160.jpg') }}" alt="User Image" /></div>
    <!-- Message title and timestamp -->
    <h4>Support Team
    <small><i class="fa fa-clock-o"></i> 5 mins</small></h4>
    <!-- The message -->

    Why not buy a new awesome theme?</li>
    </ul>
    </ul>
    <!-- end message -->

    <!-- /.menu --></li>
        <li class="footer"><a href="#">See All Messages</a></li>
    </ul>
    </li>
    </ul>
    </ul>
    <!-- /.messages-menu -->

    <!-- Notifications Menu -->
    <ul class="nav navbar-nav">
    <ul class="nav navbar-nav">
        <li class="dropdown notifications-menu"><!-- Menu toggle button -->
    <a class="dropdown-toggle" href="#" data-toggle="dropdown">
    <i class="fa fa-bell-o"></i>
    <span class="label label-warning">10</span>
    </a>
    <ul class="dropdown-menu">
        <li class="header">You have 10 notifications</li>
        <li><!-- Inner Menu: contains the notifications -->
    <ul class="menu">
    <ul class="menu">
        <li><!-- start notification -->
    <a href="#">
    <i class="fa fa-users text-aqua"></i> 5 new members joined today
    </a></li>
    </ul>
    </ul>
    <!-- end notification --></li>
        <li class="footer"><a href="#">View all</a></li>
    </ul>
    </li>
    </ul>
    </ul>
    <!-- Tasks Menu -->
    <ul class="nav navbar-nav">
    <ul class="nav navbar-nav">
        <li class="dropdown tasks-menu"><!-- Menu Toggle Button -->
    <a class="dropdown-toggle" href="#" data-toggle="dropdown">
    <i class="fa fa-flag-o"></i>
    <span class="label label-danger">9</span>
    </a>
    <ul class="dropdown-menu">
        <li class="header">You have 9 tasks</li>
        <li><!-- Inner menu: contains the tasks -->
    <ul class="menu">
    <ul class="menu">
        <li><!-- Task item -->
    <a href="#">
    <!-- Task title and progress text --></a>
    <h3>Design some buttons
    <small class="pull-right">20%</small></h3>
    <!-- The progress bar -->
    <div class="progress xs"><!-- Change the css width attribute to simulate progress -->
    <div class="progress-bar progress-bar-aqua" style="width: 20%;"><span class="sr-only">20% Complete</span></div>
    </div></li>
    </ul>
    </ul>
    <!-- end task item --></li>
        <li class="footer"><a href="#">View all tasks</a></li>
    </ul>
    </li>
    </ul>
    </ul>
    <!-- User Account Menu -->
    <ul class="nav navbar-nav">
    <ul class="nav navbar-nav">
        <li class="dropdown user user-menu"><!-- Menu Toggle Button -->
    <a class="dropdown-toggle" href="#" data-toggle="dropdown">
    <!-- The user image in the navbar-->
    <img class="user-image" src="{{ asset('dist/img/user2-160x160.jpg') }}" alt="User Image" />
    <!-- hidden-xs hides the username on small devices so only the image appears. -->
    <span class="hidden-xs">Alexander Pierce</span>
    </a>
    <ul class="dropdown-menu">
    <ul class="dropdown-menu"><!-- The user image in the menu -->
        <li class="user-header"><img class="img-circle" src="{{ asset('dist/img/user2-160x160.jpg') }}" alt="User Image" />Alexander Pierce - Web Developer
    <small>Member since Nov. 2012</small></li>
    </ul>
    </ul>
    <!-- Menu Body -->
    <ul class="dropdown-menu">
    <ul class="dropdown-menu">
        <li class="user-body">
    <div class="col-xs-4 text-center"><a href="#">Followers</a></div>
    <div class="col-xs-4 text-center"><a href="#">Sales</a></div>
    <div class="col-xs-4 text-center"><a href="#">Friends</a></div></li>
    </ul>
    </ul>
    <!-- Menu Footer-->
    <ul class="dropdown-menu">
        <li class="user-footer">
    <div class="pull-left"><a class="btn btn-default btn-flat" href="#">Profile</a></div>
    <div class="pull-right"><a class="btn btn-default btn-flat" href="#">Sign out</a></div></li>
    </ul>
    </li>
    </ul>
    </ul>
    <!-- Control Sidebar Toggle Button -->

    </div>
    </nav></header>
  5. Save <aside> sidebar section as a new view sidebar.blade.php. Change any hyperlink or file reference to use Laravel “asset” help function.  Save it “includes” folder.
    1
    2
    3
    4
    5
    6
    7
    8
    9
    10
    11
    12
    13
    14
    15
    16
    17
    18
    19
    20
    21
    22
    23
    24
    25
    26
    27
    28
    29
    30
    31
    32
    33
    34
    35
    36
    37
    38
    39
    40
    41
    42
    43
    44
    45
    46
              <!-- Left side column. contains the logo and sidebar -->
          <aside class="main-sidebar">

            <!-- sidebar: style can be found in sidebar.less -->
            <section class="sidebar">

              <!-- Sidebar user panel (optional) -->
              <div class="user-panel">
                <div class="pull-left image">
                  <img src="{{ asset('dist/img/user2-160x160.jpg') }}" class="img-circle" alt="User Image" />
                </div>
                <div class="pull-left info">
                  <p>Alexander Pierce</p>
                  <!-- Status -->
                  <a href="#"><i class="fa fa-circle text-success"></i> Online</a>
                </div>
              </div>

              <!-- search form (Optional) -->
              <form action="#" method="get" class="sidebar-form">
                <div class="input-group">
                  <input type="text" name="q" class="form-control" placeholder="Search..."/>
                  <span class="input-group-btn">
                    <button type='submit' name='search' id='search-btn' class="btn btn-flat"><i class="fa fa-search"></i></button>
                  </span>
                </div>
              </form>
              <!-- /.search form -->

              <!-- Sidebar Menu -->
              <ul class="sidebar-menu">
                <li class="header">HEADER</li>
                <!-- Optionally, you can add icons to the links -->
                <li class="active"><a href="#"><i class='fa fa-link'></i> <span>Link</span></a></li>
                <li><a href="#"><i class='fa fa-link'></i> <span>Another Link</span></a></li>
                <li class="treeview">
                  <a href="#"><i class='fa fa-link'></i> <span>Multilevel</span> <i class="fa fa-angle-left pull-right"></i></a>
                  <ul class="treeview-menu">
                    <li><a href="#">Link in level 2</a></li>
                    <li><a href="#">Link in level 2</a></li>
                  </ul>
                </li>
              </ul><!-- /.sidebar-menu -->
            </section>
            <!-- /.sidebar -->
          </aside>
  6. Do the same for footer and control sidebar.

    footer.blade.php

    1
    2
    3
    4
    5
    6
    7
    8
    9
         <!-- Main Footer -->
          <footer class="main-footer">
            <!-- To the right -->
            <div class="pull-right hidden-xs">
              Anything you want
            </div>
            <!-- Default to the left -->
            <strong>Copyright &copy; 2015 <a href="#">Company</a>.</strong> All rights reserved.
          </footer>

    controlsidebar.blade.php

    1
    2
    3
    4
    5
    6
    7
    8
    9
    10
    11
    12
    13
    14
    15
    16
    17
    18
    19
    20
    21
    22
    23
    24
    25
    26
    27
    28
    29
    30
    31
    32
    33
    34
    35
    36
    37
    38
    39
    40
    41
    42
    43
    44
    45
    46
    47
    48
    49
    50
    51
    52
    53
    54
    55
    56
    57
    58
    59
    60
    61
    62
                   <!-- Control Sidebar -->      
          <aside class="control-sidebar control-sidebar-dark">                
            <!-- Create the tabs -->
            <ul class="nav nav-tabs nav-justified control-sidebar-tabs">
              <li class="active"><a href="#control-sidebar-home-tab" data-toggle="tab"><i class="fa fa-home"></i></a></li>
              <li><a href="#control-sidebar-settings-tab" data-toggle="tab"><i class="fa fa-gears"></i></a></li>
            </ul>
            <!-- Tab panes -->
            <div class="tab-content">
              <!-- Home tab content -->
              <div class="tab-pane active" id="control-sidebar-home-tab">
                <h3 class="control-sidebar-heading">Recent Activity</h3>
                <ul class='control-sidebar-menu'>
                  <li>
                    <a href='javascript::;'>
                      <i class="menu-icon fa fa-birthday-cake bg-red"></i>
                      <div class="menu-info">
                        <h4 class="control-sidebar-subheading">Langdon's Birthday</h4>
                        <p>Will be 23 on April 24th</p>
                      </div>
                    </a>
                  </li>              
                </ul><!-- /.control-sidebar-menu -->

                <h3 class="control-sidebar-heading">Tasks Progress</h3>
                <ul class='control-sidebar-menu'>
                  <li>
                    <a href='javascript::;'>              
                      <h4 class="control-sidebar-subheading">
                        Custom Template Design
                        <span class="label label-danger pull-right">70%</span>
                      </h4>
                      <div class="progress progress-xxs">
                        <div class="progress-bar progress-bar-danger" style="width: 70%"></div>
                      </div>                                    
                    </a>
                  </li>                        
                </ul><!-- /.control-sidebar-menu -->        

              </div><!-- /.tab-pane -->
              <!-- Stats tab content -->
              <div class="tab-pane" id="control-sidebar-stats-tab">Stats Tab Content</div><!-- /.tab-pane -->
              <!-- Settings tab content -->
              <div class="tab-pane" id="control-sidebar-settings-tab">            
                <form method="post">
                  <h3 class="control-sidebar-heading">General Settings</h3>
                  <div class="form-group">
                    <label class="control-sidebar-subheading">
                      Report panel usage
                      <input type="checkbox" class="pull-right" checked />
                    </label>
                    <p>
                      Some information about this general settings option
                    </p>
                  </div><!-- /.form-group -->
                </form>
              </div><!-- /.tab-pane -->
            </div>
          </aside>
          <!-- Add the sidebar's background. This div must be placed
              immediately after the control sidebar -->
          <div class='control-sidebar-bg'></div>
  7. Include newly created sub-views in admin.blade.php  (http://laravel.com/docs/5.0/templates).
    1
    2
    3
    4
        @include('includes.header');
        @include('includes.sidebar');
        @include('includes.footer');
        @include('includes.controlsidebar');
  8. In admin.blade.php, add the section between sidebar and footer. Copy and past section <div class=”content-wrapper”> where we will host our main content in which phpGrid is also rendered. Also include @yield(‘content’) in <section class=”content”>
    1
    2
    3
    4
    5
    6
    7
    8
    9
    10
    11
    12
    13
    14
    15
    16
    17
    18
    19
    20
    21
    22
    23
    24
    25
    26
    27
    28
    29
    30
    31
    32
    33
    34
    35
    36
    37
    38
    39
    40
            <div class="wrapper">


          @include('includes.header')
          @include('includes.sidebar')


          <!-- Content Wrapper. Contains page content -->
          <div class="content-wrapper">
            <!-- Content Header (Page header) -->
            <section class="content-header">
              <h1>
                Page Header
                <small>Optional description</small>
              </h1>
              <ol class="breadcrumb">
                <li><a href="#"><i class="fa fa-dashboard"></i> Level</a></li>
                <li class="active">Here</li>
              </ol>
            </section>

            <!-- Main content -->
            <section class="content">

              <!-- Your Page Content Here -->
              @yield('content')

            </section><!-- /.content -->
          </div><!-- /.content-wrapper -->


          @include('includes.footer')
          @include('includes.controlsidebar')


        </div><!-- ./wrapper -->
  9. Move the required javascript in the bottom of “starter.html” to <head>.
    1
    2
    3
    4
    5
    6
    7
    8
    9
    10
    11
        !– REQUIRED JS SCRIPTS –>
        <!– jQuery 2.1.4 –>
        <script src={{ asset(‘plugins/jQuery/jQuery-2.1.4.min.js’) }}”></script>
        <!– Bootstrap 3.3.2 JS –>
        <script src={{ asset(‘bootstrap/js/bootstrap.min.js’) }}type=text/javascript”></script>
        <!– AdminLTE App –>
        <script src={{ asset(‘dist/js/app.min.js’) }}type=text/javascript”></script>
        <!– Optionally, you can add Slimscroll and FastClick plugins.
        Both of these plugins are recommended to enhance the
        user experience. Slimscroll is required when using the
        fixed layout. –>
  10. Almost done. In admin.blade.php, make sure to change any hyperlink or file reference to use Laravel “asset” help function.


Create “dashboard.blade.php” Child Template View


We just made our admin layout by converting “starter.html” to various views and sub-views. “admin.blade.php” will be our parent layout used as a basis for all other admin layouts. All other admin layouts will extend from “admin.blade.php.” $grid is the variable that holds our datagrid passed from route next.

1
2
3
4
5
@extends('admin')

@section('content')
    {!! $grid !!}
@endsection


Where Is phpGrid??


So far Much of the walk-through addresses converting AdminLTE to Laravel views.

Everything in Laravel 5 is autoloaded using PSR-4 within the app/ directory. You can also see this in the composer.json file. phpGrid currently does not support namespace for backward compatibility reason. In the future release it will. Without namespace we cannot call our C_DataGrid class in Laravel Controller. The workaround is to directly call phpGrid inside route file. And instead store phpGrid in app/ directory, we keep phpGrid in public folder. So go ahead and download a copy of phpGrid if you have done so, and extract to Laravel “public” folder. Make sure to setup phpGrid configuration in its conf.php file.

In Laravel route file “app/Http/routes.php”, add the following:

1
2
3
4
5
6
7
8
9
10
11
12
Route::get(‘dashboard’, function () {
require_once(public_path() ./phpGrid_Lite/conf.php”);

$dg = new C_DataGrid(“SELECT * FROM orders”, “orderNumber”, “orders”);
$dg->enable_edit(“INLINE”, “CRUD”);
$dg->enable_autowidth(true)->enable_autoheight(true);
$dg->set_theme(‘cobalt-flat’);
$dg->display(false);

$grid = $dg -> get_display(true);  // do not include required javascript libraries until later with with display_script_includeonce method.
return view(‘dashboard’, [‘grid’ => $grid]);
});

That’s it. You should be able to run the demo.


Where is the controller?


Hope this tutorial will get youn a jump started using phpGrid with Laravel. Now you are probably going to ask where is Laravel controller for our view?  The answer is there is simply not needed at this point, at least not for our datagrid. The route we created in previous step essentially does that for us. In a perfect world, we would fancy controller being the only place to handle logic and pass information to views for rendering. Current lack of namespace prohibits calling phpGrid library inside Laravel Controller. However, it’s planned to add namespace in the future.

Have a grid day!

Richard


Reference:

The post phpGrid, Laravel 5 and Bootstrap 3 appeared first on phpGrid.

phpGrid and Codeigniter Integration

$
0
0

phpGrid-Codeigniter-outcome


Introduction

It’s easy to integrate CodeIgniter with phpGrid. CodeIgniter is a popular, open source PHP framework loosely based on MVC development pattern for use in building dynamic web sites. Out of box, phpGrid is a read-to-use PHP datagrid solution.


Install CodeIgniter

Download CodeIgniter here. CodeIgniter is installed in four steps:

  1. Unzip the package.
  2. Upload the CodeIgniter folders and files to your server. Normally the index.php file will be at your root.
  3. Open the application/config/config.php file with a text editor and set your base URL. If you intend to use encryption or sessions, set your encryption key.
  4. If you intend to use a database, open the application/config/database.php file with a text editor and set your database settings.


Install phpGrid

Download phpGrid here. Install phpGrid in the followings steps:

  1. Unzip the phpGrid download file.
  2. Upload unzipped phpGrid folder to “aplication/libraries” folder.
  3. Complete the installation by configuring the conf.php file. For instructions on how to do this, see setup phpGrid configuration.


CodeIgniter Controller

For the sake of this tutorial, we will directly modify the default controller file “Welcome.php”. In practice, it can be any existing or new controller file. Pay attention that we did not initialize the class using the standard:

1
$this->load->library('someclass');

Where someclass is the file name, without the “.php” file extension. Instead we simply include phpGrid configuration file. APPPATH constant is path to your application folder. Unlike Laravel framework, you can directly include PHP classes and working with them. phpGrid is a complex component and composed of multiple classes.

1
2
3
4
5
6
7
8
9
public function index()
{
    // $this->load->view('welcome_message');

    require_once(APPPATH. 'libraries/phpGrid_Lite/conf.php'); // APPPATH is path to application folder
    $data['phpgrid'] = new C_DataGrid("SELECT * FROM Orders", "orderNumber", "Orders"); //$this->ci_phpgrid->example_method(3);

    $this->load->view('show_grid',$data);
}

Note the last line is our new view we are about to create. The view is called “show_grid”.

phpGrid-Codeigniter-code


Create View

Our view is very simple in this tutorial.  All you have to do is to put  <?php $phpgrid->display(); ?> somewhere in the view. Learn more about creating a basic PHP grid here.

1
2
3
4
5
6
7
8
9
10
11
12
13
14
15
16
17
18
19
20
21
<?php
defined('BASEPATH') OR exit('No direct script access allowed');
?><!DOCTYPE html>
<html lang="en">
<head>
    <meta charset="utf-8">
    <title>Show Grid</title>
</head>
<body>

<div id="container">
    <h1>Welcome to CodeIgniter! Show me the grid!</h1>

    <div id="body">
        <?php $phpgrid->display(); ?>
    </div>

</div>

</body>
</html>

That’s it! phpGrid handles all the CRUD operations. We don’t need to create Model for PHP datagrid to run in CodeIgniter.

The post phpGrid and Codeigniter Integration appeared first on phpGrid.

Google Spreadsheet Integration

$
0
0

You can also use Google Spreadsheet as a data source to populate your datagrid. In this tutorial, you will learn how to create a shared Google Spreadsheet and share it in comma-separated values (CSV) format. Note that array data source is a feature only available in Enterprise license.

Loading from Google Spreadsheet is straight forward as if loading from a local array data source. first of all, in order for our system to download the Google Spreadsheet in CSV format, you need to follow this guide to generate a download link for the CSV file of Google Drive Spreadsheet.


Open a Google Drive Spreadsheet


Open an existing Google Spreadsheet like the following:

google-spreadsheet-original


Share the Google Spreadsheet

  1. Click Change… to change access settings,
  2. Click “Public on the Web” or “Anyone with the link”,
  3. Click Save
     

    google-spreadsheet-sharing


Publish on the Web

  1. Click File >Publish on the Web


    google-spreadsheet-publish-menu

  2. Click “Advanced”, and make sure “Automatically republish when changes are made” is checked.google-spreadsheet-publish
     
  3. Choose “Comma-separated values (.csv) as output type in Link type drop-down
     

    google-spreadsheet-share-csv-output

     
  4. Finally copy document link.You should have a link similar to the following with output=csv in URL parameter:
    https://docs.google.com/spreadsheets/d/1IvbMsUZTCdY7duciT3lWSXHPP_qPDG8FrJl8dq1ZbI/pub?output=csv
     

    google-spreadsheet-share-link


Start Coding

First of all, we need to massage our data into format that phpGrid can recognize. You can read more about it in local array data data example. In our Google Spreadsheet sample file, the first row contains the header information. We will also extract that row as the name for each column in datagrid. After formatting, the data become accessible as if it is a local file.

1
2
3
4
5
6
7
8
9
10
11
12
$spreadsheet_url = 'https://docs.google.com/spreadsheets/d/1IvbMsUZTCdYb5z34jT3lWSXHPP_qPDG8FrJl8dq1ZbI/pub?output=csv';
$csv = file_get_contents($spreadsheet_url);
$rows = explode("\n",$csv);
$data = array();
$names = array();
for($i=0; $i<count($rows); $i++) {
if($i==0){
$names = str_getcsv($rows[$i]);
}else{
$data[] = str_getcsv($rows[$i]);
}
}

Finally, we add our phpGrid code. We first add title to each datagrid column. We also enable auto filter in integrated search, and lastly give it a new look using our premium theme “aristo”.

Please note that search auto filter is a new feature that dynamically generates filter drop-down in integrated toolbar search based on column’s unique values. Since Google Spreadsheet does not send separate column header in its .csv format, here we use column index array, e.g. array(1,2,3,5), as our search auto filter.

1
2
3
4
5
6
$dg = new C_DataGrid($data, "id", "Google_Spreadsheet");
for($i=0; $i<count($names); $i++) { $dg->set_col_title($i, $names[$i]);
}
$dg->enable_search(true, array(1,2,3,5));
$dg->set_theme('aristo');
$dg->display();

That’s how you populate datagrid from a Google Spreadsheet. Enjoy!

The post Google Spreadsheet Integration appeared first on phpGrid.

phpGrid and Zend Framework Integration

$
0
0
zf2-phpgrid

Introduction


This tutorial will walk you through the integration of the Zend Framework 2 and phpGrid. Zend Framework (ZF) is a popular open source, MVC web application framework created and maintained by Zend Technologies, the company behind PHP programming language.


Install Zend Framework Skeleton Application


The best way to create a Zend Framework project is to use Composer. This tutorial uses Zend Framework version 2.4 that requires PHP version 5.5 and above. In this tutorial, you will start by installing the ZendSkeletonApplication from Github using Composer. It’s a great starting point to begin a blank Zend project.

Create your new ZF2 project:

1
composer create-project -n -sdev zendframework/skeleton-application path/to/install

path/to/install should be a folder in web root.


Install phpGrid


Before installing phpGrid, in the ZF2 that we installed in the previous step, find the “vendor” folder, and create a new directory named “phpcontrols” inside. Then download phpGrid and extract the zip file into the “phpcontrols” folder we just created.

You should have folder structure similar to the following screenshot:

zendframework-folder


Configuring conf.php file in phpGrid

Complete the phpGrid installation by configuring its database information in file “conf.php” inside phpGrid folder. For complete instructions on how to do this, see phpGrid configuration online documentation. phpGrid comes with several sample databases. You can find them under “examples/SampleDB” folder. We will use the MySql sample database for Zend Framework integration tutorial.

Modify composer.json

Before start coding, we need to register our phpGrid library in Zend Framework autoloader by adding autoload files keys in composer.json. Autoloader ensures that any PHP external libraries and components can be easily referenced anywhere in PHP code without using the traditional require or php include function.

Below is a copy of our composer.json. It could be slightly from what you have, and notice the autoload value.

1
2
3
4
5
6
7
8
9
10
11
12
13
14
15
16
17
{
    "name": "zendframework/skeleton-application",
    "description": "Skeleton Application for ZF2",
    "license": "BSD-3-Clause",
    "keywords": [
        "framework",
        "zf2"
    ],
    "homepage": "http://framework.zend.com/",
    "require": {
        "php": ">=5.5",
        "zendframework/zendframework": "~2.5"
    },
    "autoload":{
        "files": ["vendor/phpcontrols/phpGrid/conf.php"]
    }
}

Finally, update composer after making the changes. In the project root, run the following

1
composer update


Start coding!


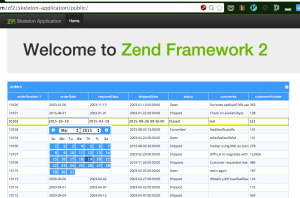
Open file “module/Application/view/application/index/index.phtml“. Assuming that you have installed phpGrid sample database installed,. Somewhere in index.phtml, add the following:

1
2
3
$dg = new \C_DataGrid("SELECT * FROM orders", "orderNumber", "orders");
$dg -> enable_edit("INLINE", "CRUD");
$dg -> display();

Note that if you are under a namespace while creating the object, you must use the “\” (root namespace), otherwise you will use the phpGrid class under the current namespace.

That’s all there it is. You should be able to run the demo.

Run Demo


What about the controller and model?

You are probably wondering, “Where is the ZF controller and model for phpGrid?” The answer is they are simply not required. phpGrid encapsulates both database access routines and display so you don’t have to worry about them. It does those magic “behind the scene”.

The post phpGrid and Zend Framework Integration appeared first on phpGrid.

phpGrid Now Has Better IBM DB2 Support!

$
0
0
phpgrid-db2


After months of hard work, phpGrid now finally has native IBM DB2 database support! phpGrid’s DB2 support has been spotty in the past, owing to the fact that the ADOBdb data access library it uses legacy IBM DB2 driver. A new PDO data access class has been implemented specifically for DB2.*

We tried uber-hard to make sure that the existing phpGrid API stayed the same. The changes made were essential, and they are transparent to our users. Simply use the new database by typing “pdo_odbc_db2” as the PHPGRID_DB_TYPE value in conf.php, and viola, you are done! Everything else stays the same.


IBM i Developers, Rejoice.


A large number of IBM i developers have been working with DB2, the IBM’s Relational Database Management System (RDBMS). You can use phpGrid as your data management tool in your IBM i environment because the PHP runtime is already preloaded with IBM i. This means, they can get a super-charged datagrid with built-in CRUD capability, up and working very quickly without much knowledge of the ins and outs of PHP.

The DB2 was fully tested in IBM DB2 Express-C. It requires PDO_ODBC extension through unixODBC. As of PHP 5.1, PDO_ODBC is included in the PHP source. You verify using phpinfo. Both web server and DB2 must be on the same server. If you have trouble install unixODBC, I suggest install Zend Server (free) to easily installs PDO_ODBC (unixODBC) extension through its wonderful admin dashboard. Lastly, set up the DSN in odbc.ini and odbcinst.ini configuration files using DB2 db2sampl database.

odbc.ini

1
2
3
[sample]
Description = Test to DB2
Driver      = DB2

odbcinst.ini

1
2
3
4
5
6
[db2]
Description = DB2 Driver
Driver      = /opt/ibm/db2/V10.5/lib32/libdb2.so
Driver64    = /opt/ibm/db2/V10.5/lib64/libdb2.so
FileUsage   = 1
DontDLClose = 1

*Note that DB2 support is available with an Enterprise license.


A sample of conf.php in phpGrid. Notice the putenv environment variable settings.

conf.php

1
2
3
4
5
6
7
8
9
10
define('PHPGRID_DB_HOSTNAME', 'localhost'); // database host name
define('PHPGRID_DB_PORT', '50000'); // database host name
define('PHPGRID_DB_USERNAME', 'db2inst1');     // database user name
define('PHPGRID_DB_PASSWORD', 'xxxxxxxx'); // database password
define('PHPGRID_DB_NAME', 'SAMPLE'); // database name or DSN name (cataloged)
define('PHPGRID_DB_TYPE', 'pdo_odbc_db2');  // database type
define('PHPGRID_DB_CHARSET','utf8'); // ex: utf8(for mysql),AL32UTF8 (for oracle), leave blank to use the default charset

putenv('ODBCSYSINI=/etc');
putenv('ODBCINI=/etc/odbc.ini');

Finally, the sample code using the DB2 db2sampl database:

1
2
3
4
5
6
7
8
9
10
11
12
13
14
15
16
17
18
$dg = new C_DataGrid("SELECT * FROM EMPLOYEE", "EMPNO", "EMPLOYEE");
$dg->set_col_title('EMPNO', 'Employee #');
$dg->set_col_title('PHONENO', 'Phone Number');
$dg->set_col_width('SEX', 50)->set_col_align('SEX', 'center');
$dg->set_col_width('MIDINIT', 30)->set_col_align('MIDINIT', 'center');
$dg->enable_search(true);
$dg->enable_edit('FORM');
$dg->enable_export('CSV');
$dg->enable_autowidth(true);
$dg->set_col_edittype('WORKDEPT', 'select', 'select DEPTNO, DEPTNAME from DEPARTMENT');
$dg->set_col_edittype('SEX', 'select', 'M:M;F:F');
$dg->set_conditional_format("SEX","CELL",array(
    "condition"=>"eq","value"=>"F","css"=> array("color"=>"black","background-color"=>"#FDA6B2")));
$dg->set_conditional_format("SEX","CELL",array(
    "condition"=>"eq","value"=>"M","css"=> array("color"=>"black","background-color"=>"#A6D7FC")));
$dg->set_conditional_format("SALARY","CELL",array(
    "condition"=>"gt","value"=>75000,"css"=> array("color"=>"black","background-color"=>"lightgreen")));
$dg -> display();

Sample datagrid output:
 

phpgrid-db2sampl-employee

The post phpGrid Now Has Better IBM DB2 Support! appeared first on phpGrid.


phpGrid, Laravel 5 Integration – Part II (Improved version)

$
0
0

In the previous phpGrid Laravel 5 tutorial part 1, we have chosen to leave the phpGrid code inside route.php. In this tutorial, we will improve upon what we have learned in part 1. We will move the phpGrid folder out of public directory and move it to app folder instead; and then we will undo changes in route.php and add phpGrid code inside controller file.

Let’s get started.


Move phpGrid folder into Laravel \app folder


Technically, you can put a class itself anywhere you want within \app folder. I personally prefer to create a separate one such as app\Libraries for any external libraries.

Make sure to udpate SERVER_ROOT value in conf.php. See below folder structure

phpgrid laravel5 part2 folder structure


Undo changes made in route.php


In route.php, undo the dashboard route changes back we made in Part I back to default. We will be moving the phpGrid code to controller as it is the properly place to organize your application behaviors.

1
Route::get('dashboard', 'DashboardController@index');


A better way to include an external library in Laravel 5


Apparently it’s possible to include PHP classes without namespace in controller. Strictly speaking, we will be using the “\” (root namespace) as the default namespace.

First of all, let’s get autoloader to work.

Modify composer.json

Before start coding, we need to register our phpGrid library in Laravel autoloader by adding autoload files keys in composer.json. Autoloader ensures that any PHP external libraries and components can be easily referenced anywhere in PHP code without using the traditional require or php include function.

Below is a copy of our composer.json. It could be slightly from what you have, and notice the autoload value.

1
2
3
4
5
6
7
8
9
    "autoload": {
        "classmap": [
            "database"
        ],
        "psr-4": {
            "App\\": "app/"
        },
        "files": ["app/Libraries/phpGrid_Lite/conf.php"]
    },

Notice: if you make these changes to composer.json file, don’t forget to run composer dump-autoload or composer update for changes to take effect.

1
composer dump-autoload

– OR –

1
composer update


Modify DashboardController.php


Open DashboardController.php in “app\Http\Controllers” folder, and change the index() function to the following. Note that if you are under a namespace while creating the object, you must use the “\” (root namespace), otherwise you will use the phpGrid class under the current namespace.

1
2
3
4
5
6
7
8
9
10
11
12
13
public function index()
{
    $dg = new \C_DataGrid("SELECT * FROM orders", "orderNumber", "orders");
    $dg->enable_edit("FORM", "CRUD");
    $dg->enable_autowidth(true)->enable_autoheight(true);
    $dg->set_theme('cobalt-flat');
    $dg->set_grid_property(array('cmTemplate'=>array('title'=>false)));
    $dg->display(false);

    $grid = $dg -> get_display(true);

    return view('dashboard', ['grid' => $grid]);
}

That’s all there it is. You should be able to run the demo.

Run Demo

reference:
http://laraveldaily.com/how-to-use-external-classes-and-php-files-in-laravel-controller/

The post phpGrid, Laravel 5 Integration – Part II (Improved version) appeared first on phpGrid.

set_pivotgrid()

$
0
0

* Pivot grid is only available in Enterprise version 6.6+. 

  • Parameter(s):
    • $configuration: Pivot configuration array parameter. Please see pivot demo for more information.
  • Description:
    • Create pivot grid from an existing datagrid. It renders the regular datagrid first, and then pivots based on configuration settings. In essence, phpGrid creates pivot in the client side browser without requiring any server side resource.
  • Remark:
    • You will first see a loading icon while pivot is rendered before it is displayed. It’s by design.
  • Example:
1
2
3
4
5
6
7
8
9
10
11
12
13
14
15
16
17
18
19
20
21
22
23
24
25
26
27
28
29
30
31
32
33
34
35
36
37
38
39
40
41
42
43
44
45
46
47
48
49
50
$dg-&gt;set_pivotgrid(
array
(
"footerTotals" =&gt; 1,
"footerAggregator" =&gt; "sum",
"totals" =&gt; 1,
"totalHeader" =&gt; "Grand Total",
"totalText" =&gt; "Grand {0} {1}",
"xDimension" =&gt; array
(
array
(
"dataName" =&gt; "status",
"label" =&gt; "status",
"sortorder" =&gt; "desc"
),
array
(
"dataName" =&gt; "ProductName",
"label" =&gt; "Product Name",
"footerText" =&gt; "Total:"
)

),

"yDimension" =&gt; array
(
array
(
"dataName" =&gt; "orderDate",
"sorttype" =&gt; "date",
"totalHeader" =&gt; "Total in {0}"
)

),

"aggregates" =&gt; array
(
array
(
"member" =&gt; "status",
"aggregator" =&gt; "count",
"summaryType" =&gt; "count",
"label" =&gt; "{1}"
)

)

)
);

The post set_pivotgrid() appeared first on phpGrid.

set_col_headerTooltip()

$
0
0
  • Parameter(s):
    • $col_name: Column name.
    • $tooltip: Tooltip text.
  • Description:
    • Set column tooltip
  • Example:


1
$dg -> set_col_headerTooltip('my_column', 'tooltip text');

The post set_col_headerTooltip() appeared first on phpGrid.

Complete Date Format Demo

$
0
0
date-format

The example demonstrates date column formatting using functions set_col_date, set_col_datetime, set_col_property(…formatter”=>”date”,…). If you have trouble with date format, most likely you will find answer here. Also pay attention to inline comments.

1
2
3
4
5
6
7
8
9
10
11
12
13
14
15
16
17
18
19
20
21
22
23
24
25
26
27
28
29
30
$dg = new C_DataGrid("SELECT * FROM orders", "orderNumber", "orders");

// Method 1: change date display and datepicker display (used for edit) to Spanish date
$dg -> set_col_date("orderDate", "Y-m-d", "m/d/Y", "m/d/yy");

// Method 2: change date display and datepicker display (used for edit) to Spanish date
$dg -> set_col_property("requiredDate",
                             array("formatter"=>"date",
                                   "formatoptions"=>array("srcformat"=>"Y-m-d","newformat"=>"m/d/Y"),
                                   "editoptions"=>array(
                                        "dataInit"=>"function(el) {
                                            $(el).datepicker({
                                                changeMonth: true,
                                                changeYear: true,
                                                dateFormat: 'm/d/yy'
                                            })
                                        }"
)));

// Method 3: Display using jQuery Datetimepicker extension replacing the built-in datepicker plus option time picker
$dg -> set_col_datetime("contractDateTime", "Y-m-d H:i", "m/d/Y H:i", "m/d/Y H:i");

// Display time only. No date. It cannot be edited, so we also made it hidden on the edit form.
$dg -> set_col_property("shippedDate",
            array("formatter"=>"date",
                "formatoptions"=>array("srcformat"=>"ISO8601Short","newformat"=>"g:i A"),
                'editable'=>false,'hidedlg'=>true));


$dg->enable_edit();
$dg -> display();

See Live demo!

The post Complete Date Format Demo appeared first on phpGrid.

Pivot Grid

$
0
0
pivot-grid

phpGrid now supports pivot grid through a simple function “set_pivotgrid“.

Simply passing the pivot configration array parameter simialr to the following such as xDimension and yDimension, aggregates as well as footer and header in the array.

1
2
3
4
5
6
7
8
9
10
11
12
13
14
15
16
17
18
19
20
21
22
23
24
25
26
27
28
29
30
31
32
33
34
35
36
37
38
39
40
41
42
43
44
45
46
47
48
array
(
    "footerTotals" => 1,
    "footerAggregator" => "sum",
    "totals" => 1,
    "totalHeader" => "Grand Total",
    "totalText" => "Grand {0} {1}",
    "xDimension" => array
        (
            array
                (
                    "dataName" => "status",
                    "label" => "status",
                    "sortorder" => "desc"
                ),
            array
                (
                    "dataName" => "ProductName",
                    "label" => "Product Name",
                    "footerText" => "Total:"
                )

        ),

    "yDimension" => array
        (
            array
                (
                    "dataName" => "orderDate",
                    "sorttype" => "date",
                    "totalHeader" => "Total in {0}"
                )

        ),

    "aggregates" => array
        (
            array
                (
                    "member" => "status",
                    "aggregator" => "count",
                    "summaryType" => "count",
                    "label" => "{1}"
                )

        )

)

Complete sample code:

1
2
3
4
5
6
7
8
9
10
11
12
13
14
15
16
17
18
19
20
21
22
23
24
25
26
27
28
29
30
31
32
33
34
35
36
37
38
39
40
41
42
43
44
45
46
47
48
49
50
51
52
53
54
55
$dg = new C_DataGrid("SELECT * FROM orders", "orderNumber", "orders");

// setting options: http://www.trirand.com/jqgridwiki/doku.php?id=wiki:pivotsettings
$dg->set_pivotgrid(
        array
        (
            "footerTotals" => 1,
            "footerAggregator" => "sum",
            "totals" => 1,
            "totalHeader" => "Grand Total",
            "totalText" => "Grand {0} {1}",
            "xDimension" => array
                (
                    array
                        (
                            "dataName" => "status",
                            "label" => "status",
                            "sortorder" => "desc"
                        ),
                    array
                        (
                            "dataName" => "ProductName",
                            "label" => "Product Name",
                            "footerText" => "Total:"
                        )

                ),

            "yDimension" => array
                (
                    array
                        (
                            "dataName" => "orderDate",
                            "sorttype" => "date",
                            "totalHeader" => "Total in {0}"
                        )

                ),

            "aggregates" => array
                (
                    array
                        (
                            "member" => "status",
                            "aggregator" => "count",
                            "summaryType" => "count",
                            "label" => "{1}"
                        )

                )

        )
    );

$dg -> display();

See Live demo!

The post Pivot Grid appeared first on phpGrid.

Viewing all 107 articles
Browse latest View live