Quantcast
Channel: phpGrid – PHP Datagrid
Viewing all 107 articles
Browse latest View live

Announcing phpGrid v6.7

$
0
0

Today we released phpGrid version 6.7. It updates several major core components to support PHP 7.

List of main changes:

  • PHP 7 support!
  • PDF class updated to support PHP 7
  • Native Excel export (requires PHPExcel)
  • ADOdb 5.20 data access library update for PHP 7 support
  • Bug fix subgrid to add readonly fields support
  • Minor theme update.

New and updated online demos:

  1. Column auto width. Noted in green banner.
  2. Pivot grid
  3. New date format demo
  4. New header tooltip function set_col_headerTooltip 

Thank you and have a grid day!

Richard
p.s. check out the complete phpGrid version history.

The post Announcing phpGrid v6.7 appeared first on phpGrid.


Persist Row Selection Following Pagination

$
0
0

You can select multiple records with set_multiselect() method. When multiselect is enabled, a checkbox is shown to the left of each row. Out of box, you can use multiselect feature to delete multiple records. No additional code is required.

Version 6.7.10 Update

Set the 2nd parameter in set_multiselect() to true to persist row selection following pagination. Before the selection is lost after going to another page.

1
2
3
4
5
6
7
8
9
10
11
12
13
14
15
16
17
18
19
20
21
22
23
24
$dg = new C_DataGrid("SELECT * FROM Orders", "orderNumber", "Orders");

// change column titles
$dg -> set_col_title("orderNumber", "Order No.");
$dg -> set_col_title("orderDate", "Order Date");
$dg -> set_col_title("shippedDate", "Shipped Date");
$dg -> set_col_title("customerNumber", "Customer No.");
 
// enable edit
$dg -> enable_edit("INLINE", "CRUD");

// hide a column
$dg -> set_col_hidden("requiredDate");

// read only columns, one or more columns delimited by comma
$dg -> set_col_readonly("orderDate, customerNumber");

// required fields
$dg -> set_col_required("orderNumber, customerNumber");

// multiple selection. The 2nd true signals grid not lose selections following pagination
$dg -> set_multiselect(true, true);
 
$dg -> display();

Bonus: send selected rows back to server

We can also easily obtain the selected row information and send captured rows back to server side for additional processing via AJAX. Below we got some working code snippets so you can get jump started. Check out the live example to see them in action!

Retrieve selected rows (Javascript)

1
2
3
4
5
function ShowSelectedRows(){
    var rows = getSelRows();
    // replace your own javascript here
    alert(rows);
}

Retrieve selected row ids and posted to a remote URL via $.ajax in JSON format (Javascript)

1
2
3
4
5
6
7
8
9
10
11
12
13
14
15
16
function saveSelectedRowIds() {
    var rows = getSelRows();
    if (rows == "") {
        alert("no rows selected");
        return;
    } else {
        $.ajax({
          url: 'http://example.com/save_selected_rowids.php',
          data: {selectedRows: rows},
          type: 'POST',
          dataType: 'JSON'
        });
        alert(rows + ' row Ids were posted to a remote URL via $.ajax');
    }
    // window.location = "index.php#ajax/save_selected_row.php?refresh=1&rows="+rows;
}

Retrieve selected rows objects and posted to a remote URL via $.ajax in JSON format (Javascript)

1
2
3
4
5
6
7
8
9
10
11
12
13
14
15
16
17
18
19
20
21
22
23
24
25
26
27
28
function saveSelectedRows(){
    gdata = $('#orders').jqGrid('getRowData');
    rows = getSelRows();
    if (rows == "") {
        alert("no rows selected");
        return;
    } else {
        selIndices = [];  // get index selected
        $.each(gdata, function(index, value){
            if($.inArray(value["orderNumber"], rows) != -1){
                selIndices.push(index);
            }
        });
        selRows = [];   // get row object from each index selected
        $.each(gdata, function(index, value){
            if($.inArray(index, selIndices) != -1){
                selRows.push(gdata[index]);
            }
        })
        $.ajax({
          url: 'http://example.com/save_selected_rows.php',
          data: {selectedRows: selRows},
          type: 'POST',
          dataType: 'JSON'
        });
        alert(selRows + ' with row ids ' + rows + ' were posted to a remote URL via $.ajax');
    }
}

To get value from a different cell of the select row:

1
$('#TABLE_NAME').jqGrid('getCell',row_id,'COLUMN NAME');

See Live Example!

The post Persist Row Selection Following Pagination appeared first on phpGrid.

PHP Namespaces Support

$
0
0

In PHP, you can’t have two classes that share the same name. It becomes a problem when your code grows such as a third party class library could happen to have a class the same as yours. Introduced in version 5.3, PHP namespaces allow us to circumvent this issue. Namespace helps to avoid naming collision and also organizes our code into “packages”. Modern PHP frameworks such as Laravel and CodeIgniter also use namespace to package code into smaller components. It is necessary for phpGrid to support namespace as more people are integrating phpGrid with those frameworks.

We are happy to announce that PHP namespaces support in phpGrid is coming soon. Still not sure what that means? Don’t be alert! The good news is that it requires little changes in your existing phpGrid code. All you will need is to add the following in the first line.

1
use phpGrid\C_DataGrid;

That’s all you will have to do. There’s really nothing special about it.

Stay tuned!

The post PHP Namespaces Support appeared first on phpGrid.

Working with Complex Query

$
0
0

Complex query is supported through SQL View or using array. However, editing is not possible.

1. Generate PHP array from your query:

1
2
3
4
5
6
7
8
9
10
11
12
13
14
15
16
17
18
19
20
21
$sql = 'select
        s.supplierCode, s.supplierZip, s.supplierPhonenumber,
        spl.productLineNo, spl.productLine,
        p.productName, p.MSRP
        from suppliers s
        inner join supplierproductlines spl on s.supplierName = spl.supplierName
        inner join products p on s.supplierZip = p.supplierZip'
;

$db = new C_DataBase(PHPGRID_DB_HOSTNAME, PHPGRID_DB_USERNAME, PHPGRID_DB_PASSWORD, PHPGRID_DB_NAME, PHPGRID_DB_TYPE,PHPGRID_DB_CHARSET);

$results = $db->db_query($sql);
$data1 = array();
$count = 0;
while($row = $db->fetch_array_assoc($results)) {
 $data_row = array();
    for($i = 0; $i < $db->num_fields($results); $i++) {
        $col_name = $db->field_name($results, $i);
        $data1[$count][$col_name] = $row[$col_name];
    }
    $count++;
}

2. Pass above generated array “data1” to phpGrid.

1
2
3
$dg = new C_DataGrid($data1, "id", "data1");
$dg->enable_edit('INLINE');
$dg->display();

Optional: Additional code snippet to submit data back to server. Users must provide their own save routine.

1
2
3
4
5
6
7
8
9
10
11
12
13
14
15
16
17
18
19
20
21
22
23
24
25
26
27
28
29
30
31
32
33
<script src="http://malsup.github.com/jquery.form.js"></script>
<form id="admin_form">
    <div>
        <input type="submit" value="Submit Local Changes">
    </div>
</form>

<script>
    $(function() {
        // bind to the form's submit event
        $('#admin_form').submit(function(event) {
            $(this).ajaxSubmit({
                type: 'post',
                dataType:'json',
                url:'save_local_array.php',
                data:{
                    langArray:[] //leave as empty array here
                },
                beforeSubmit: function(arr, $form, options){
                    options.langArray = $('#data1').jqGrid('getRowData'); // get most current
                    console.log(JSON.stringify(options.langArray));
                    // return false; // here to prevent submit
                },
                success: function(){
                    // add routine here when success
                }
            });

            // return false to prevent normal browser submit and page navigation
            return false;
        });
    });
</script>

The post Working with Complex Query appeared first on phpGrid.

Access DB2 through “ibm_db2” extension

$
0
0
phpgrid-db2
* Access to DB2 through “ibm_db2” extension is only supported in the phpGrid Enterprise license.

phpgrid_ibm_db2

phpGrid now supports IBM DB2 Universal Database through “ibm_db2” extension that uses native IBM DB2 functions. It’s faster and more efficient than using PDO_ODBC driver. Simply define “PHPGRID_DB_TYPE” value as “db2” in the conf.php file. You should use “*LOCAL” or database IP address as the “PHPGRID_DB_HOSTNAME”.

1
2
3
4
5
6
define('PHPGRID_DB_HOSTNAME','*LOCAL'); // database host name
define('PHPGRID_DB_USERNAME', '');     // database user name
define('PHPGRID_DB_PASSWORD', ''); // database password
define('PHPGRID_DB_NAME', 'SAMPLE'); // database name
define('PHPGRID_DB_TYPE', 'db2');  // database type
define('PHPGRID_DB_OPTIONS', serialize(array('i5_lib'=>'CLASSICMODELS', 'i5_naming' => DB2_I5_NAMING_ON)));
Notice the new “PHPGRID_DB_OPTIONS” constant, it defines the value for the last paramter “$options” in db2_connect function. In this constant, you can set values for the i5_* options.
X

Below is the phpGrid code sample:

1
2
3
4
5
6
7
8
9
10
11
12
$dg = new C_DataGrid("SELECT * FROM STAFF", "ID", "STAFF");
$dg->set_col_title('NAME', 'Last Name')->set_col_readonly('NAME');
$dg->enable_search(true);
$dg->enable_export('PDF');
$dg->enable_edit('FORM');
$dg->set_col_required('DEPT');
//$dg->set_col_edittype('COUNTRY', 'select', ':;');
$dg->set_conditional_format("COMM","CELL",array(
   "condition"=>"gt","value"=>1000,"css"=> array("color"=>"black","background-color"=>"lightgreen")));

$dg -> set_databar("SALARY","blue", 120000)->set_col_width('SALARY', '190px');
$dg -> display();

That’s all there is to it. Happy Gridding!

The post Access DB2 through “ibm_db2” extension appeared first on phpGrid.

Copy Row

$
0
0

phpgrid_copyrow


You can now clone a row by simply calling “enable_copyrow()” function. Once it’s enabled, select a row and then in “Copy Row” button in the footer. It will duplicate the selected row in the database table and even return the auto-incremented ID. Note that this feature requires the primary key is an auto-increment type.

1
2
3
4
$dg = new C_DataGrid("SELECT `orderNumber`, `orderDate`, `requiredDate`, `shippedDate`, `status`, `comments`, `customerNumber` FROM `orders`", "`orderNumber`", "orders");
$dg -> enable_edit("FORM", "CRUD");
$dg -> enable_copyrow(true);
$dg -> display();

Launch Copy Row Demo!

The post Copy Row appeared first on phpGrid.

Persist State of the Sort Order and Page On Page Reload

$
0
0

Sometimes you need the datagrid to be able to remember sort order and current page. For that, it requires only a single function call to “enable_persist_state()” function to enable this feature. It stores current page, sort name, sort order, and even filter information in the HTML5 “localStorge” automatically. This is different from Cookie or Session because the data stored in localStorage has no expiration time.

When you need to clear what’s int the localStorage for the current datagrid, click the “refresh” icon in the footer.

clear_localstorage

Note it does not support subgrid.

1
2
3
4
5
$dg = new C_DataGrid("SELECT * FROM orders", "orderNumber", "orders");
$dg->enable_edit('INLINE');
$dg->enable_search(true);
$dg->enable_persist_state(true);
$dg->display();

Launch Demo!

The post Persist State of the Sort Order and Page On Page Reload appeared first on phpGrid.

Drag and Drop Grouping

$
0
0

phpgrid_dnd_grouping


You can enable drag & drop a column header to group by that column with a single function call to “enable_dnd_grouping()”. Once it’s enabled, you can drag a column header and drop above the grid where it says “Drop column headers here”.

1
2
3
4
$dg = new C_DataGrid("SELECT * FROM orders", "orderNumber", "orders");
$dg->enable_edit('INLINE');
$dg->enable_dnd_grouping(true);
$dg -> display();

Launch Demo!

The post Drag and Drop Grouping appeared first on phpGrid.


Build a DataGrid With Tabs

$
0
0
Note that some features used in this demo are only supported in phpGrid Enterprise 6.9+.


tabbed-grid


We can use jQuery UI Tabs widget to build our datagrid with tabs. phpGrid already comes with the latest jQuery UI library.

First of all, let’s create our tabs. Each tab is a hyperlink with querystring to a database table name.

1
2
3
4
5
6
7
8
9
10
11
12
13
14
15
<div id="tabs">
    <ul>
        <li><a href="#tabs-1">Orders</a></li>
        <li><a href="?gn=employees">Employees</a></li>
        <li><a href="?gn=products">Products</a></li>
        <li><a href="?gn=customers">Customers</a></li>
        <li><a href="?gn=suppliers">Suppliers</a></li>
    </ul>

    <div id="tabs-1" style="padding:0">

        PLACEHOLDER - PHPGRID GOES HERE

    </div>
</div>

Apply jQuery UI Tabs function to transform the above HTML to tabs.

1
2
3
  $( function() {
    $( "#tabs" ).tabs();
  } );

The next step is to add the phpGrid code. The first tab will load from the “orders” database table. Note that the grid is not immediately displayed but delayed the render later inside the tab element.

We also didn’t include the primary key and table name in C_DataGrid construtor because we would like make the script as dynamic as possible. phpGrid will try to parse out the table name and primary key automatically (only supported in phpGrid Enterprise 6.9+).

1
2
3
4
5
6
7
8
$tableName = (isset($_GET['gn']) && isset($_GET['gn']) !== '') ? $_GET['gn'] : 'orders';

$dg = new C_DataGrid("SELECT * FROM ". $tableName);
$dg->enable_edit()->set_dimension('1100');
$dg -> display(false);
$grid = $dg -> get_display(false);

$dg -> display_script_includeonce();

Update the tabs HTML to display the datagrid.

1
2
3
4
5
6
7
8
9
10
11
12
13
14
15
<div id="tabs">
    <ul>
        <li><a href="#tabs-1">Orders</a></li>
        <li><a href="?gn=employees">Employees</a></li>
        <li><a href="?gn=products">Products</a></li>
        <li><a href="?gn=customers">Customers</a></li>
        <li><a href="?gn=suppliers">Suppliers</a></li>
    </ul>

    <div id="tabs-1" style="padding:0">
        <?php
        echo $grid;
        ?>
    </div>
</div>

Finally, we tweak UI by adding CSS.

1
2
3
4
5
6
7
8
9
#tabs ul{
    width:1093px;
}
.hidetab ul{
    display: none;
}
.ui-tabs-panel.ui-widget-content.ui-corner-bottom{
    padding:0;
}

That’s all there is to it.

Launch Demo!

The post Build a DataGrid With Tabs appeared first on phpGrid.

Advanced Search with Date & Number Range Filter

$
0
0

Advanced search now supports range filter for both date and number. To enable search use enable_advanced_search() method with parameter set to true. Once enabled, the advanced search can be toggled with the advanced search button on the footer.

To enable range operators, use set_col_property() to set the “sorttype” to date or integer.

advanced search - number range

advanced search-date range

1
2
3
4
5
6
7
8
9
10
11
12
13
14
15
16
$dg = new C_DataGrid("SELECT * FROM orders", "orderNumber", "orders");

$dg -> set_col_property("orderDate",
                        array("formatter"=>"date",
                            "sorttype"=>"date",
                            "searchoptions"=>
                                array("dataInit"=>"###datePick###")));

$dg -> set_col_property("customerNumber",
                        array("formatter"=>"integer",
                            "sorttype"=>"integer"));

$dg->enable_advanced_search(true);

$dg->enable_export('EXCEL');
$dg -> display();

Run demo

The post Advanced Search with Date & Number Range Filter appeared first on phpGrid.

WYSIWYG editor with colorpicker

$
0
0

phpGrid Wysiwyg colorpicker


Colorpicker is now built right into the phpGrid Wysiwyg editor for both inline and form edit mode. By default, a text field is a simple plain textarea. Call set_col_wysiwyg to enable the Wysiwyg feature.

Note that the field must be a text data type. You can use set_col_edittype() function to change the edit type to “textarea” first.

1
$dg -> set_col_wysiwyg('comments');

Run Demo

The post WYSIWYG editor with colorpicker appeared first on phpGrid.

Form only mode

$
0
0
phpgrid-blank-form-only

* Please note this feature is only available in paid versions (7.0+)

phpGrid now supports form only mode – displaying the form without showing the datagrid. It is extremely useful for order entry purpose to collect data from users without giving them access to all your data. Luckily, you can do this with a single line of code.

The form will remain on the screen after each submit. It also clears the form for the next order entry. You can even enhance the edit form to include group header caption and tooltips.

Note that you must enable edit and set edit mode to FORM. The form_only method is ignored in INLINE mode.

1
$dg -> form_only();

Live demo!

The post Form only mode appeared first on phpGrid.

Enhance Edit Form

$
0
0
phpgrid-form-only-load

There are many ways to enhance the edit form in regular datagrid + form, or just in form-only mode. In version 7.0, there are two new functions at your disposal, add_form_group_header() and add_form_tooltip(). Each provides a simple way to include additional text to annotate the form.

In form only mode, the form will remain on the screen after each submit.

1
2
3
4
$dg->enable_edit('FORM')->form_only()
  ->add_form_group_header('employeeNumber', 'Employee Details')
  ->add_form_group_header('email', 'Other Info')
  ->add_form_tooltip('email', 'Got mail?');

Live demo!

The post Enhance Edit Form appeared first on phpGrid.

Load Existing Record into Form (Form-Only Mode)

$
0
0
phpgrid-form-only-load

* Please note this feature is only available in paid versions.


You can load existing record data from database table into the edit form. This feature is only supported in form-only mode.

In form only mode, the form will remain on the screen after each submit. If you would like the form to redirect after submit, please see redirect_after_submit() method.

1
$dg->enable_edit('FORM')->form_only()->load_form(8888);

Live demo!

The post Load Existing Record into Form (Form-Only Mode) appeared first on phpGrid.

add_form_group_header()

$
0
0
  • Parameter(s):
    • $before_col_name: Name of column name before which display group header text
    • $text: Group header text
  • Description:
    • Display text before specified column in modal form.
  • Example:
1
$dg -> add_form_group_header('employeeNumber', 'Employ Details');

The post add_form_group_header() appeared first on phpGrid.


add_form_tooltip()

$
0
0
  • Parameter(s):
    • $col_name: Name of column name for the tooltip
    • $tooltip_text: Tool tip text
    • $symbol: Tooltip symbol. Default to (?) with CSS class name “tooltip_sym”
  • Description:
    • Display tool tip for a specified column in modal form. The default tooltip CSS class name is “tooltip_sym”.
  • Example:
1
$dg -> add_form_tooltip('email', 'Got mail?');

The post add_form_tooltip() appeared first on phpGrid.

form_only() *

$
0
0

* Please note Form-only mode is only available in paid versions. It is supported from version 7.0 and above.

  • Parameter(s):
    • none
  • Description:
    • Display the add form only without the datagrid. The form will remain on the screen and reset after each successful submit.
  • Remark:
    • Must call enable_edit(‘FORM’) prior to form_only().
  • Example:
1
$dg -> enable_edit('FORM') -> form_only();

The post form_only() * appeared first on phpGrid.

Joomla! CMS Native Support

$
0
0

* Please note this feature is only available in paid versions (version 7.0+).


phpGrid version 7 supports Joomla! 3.x out-of-box. In conf.php, set constant FRAMEWORK to JOOMLA.

1
define('FRAMEWORK', 'JOOMLA');

Depending on how Joomla is configured in your system, you may also need to modify JPATH_BASE constant value in C_SessionMaker in cls_session.php.

That’s all there is to it. Life is good. :)

The post Joomla! CMS Native Support appeared first on phpGrid.

CRUD success/error status display

$
0
0
phpgrid_update_confirmation_message

Starting version 7, phpGrid now displays status of either success or error confirmation messages without configuration. There is no additional programming required to enable this new feature in 7.0.

Prior to phpGrid version 7, you can simulate the notification with the following.

1
2
3
4
5
6
7
8
9
<pre id="_changes_debug_ajaxresponse"></pre>
<script type="text/javascript">
// replace "phpGridx" with your path to phpGrid
$(document).ajaxComplete(function( event, xhr, settings ) {
  if ( settings.url.split('?')[0] === "/<PATH TO PHPGRID FOLDER>/edit.php" ){  
    $("#_changes_debug_ajaxresponse").text(xhr.responseText);
  }
});
</script>

The post CRUD success/error status display appeared first on phpGrid.

phpGrid Symfony Integration

$
0
0
symfony-logo

Files needed for this demo


Where to keep phpGrid files in Symfony (Hint: not in “vendor” folder)

The short answer is “web” folder. Symfony web assets are used to keep things like CSS, JavaScript and image files that renders the front-end of your site. phpGrid encapsulates both database access routines and display so you don’t have to worry about them. It does this magic “behind the scenes”.

Edit conf.php in phpGrid

Remember to change the database credentials in conf.php. You do not need to set SERVER_ROOT value because phpGrid is inside public accessible “web” folder.

Enable PHP templating engine

Before we start phpGrid Symfony integration, make sure the “php” templating engine is enabled in your application configuration file under app/config .Symfony defaults to Twig for its template engine, but you can still use plain PHP code if you want. Symfony adds some nice features on top of PHP to make writing templates with PHP more powerful.

1
2
3
4
5
# app/config/config.yml
framework:
    # ...
   templating:
        engines: ['twig', 'php']

Create Symfony Controller

Symfony Controller needs to call our grid view file because we do not want to use Controller to render our datagrid. In this demo, we will modify the default controller located in folder “src/AppBundle/Controller/”. For simplicity, we keep the route path the same as the view folder structure.

1
2
3
4
5
6
7
8
/**
 * @Route("/phpgrid/simple")
 */

public function gridAction(){
   
   return $this->render('phpgrid/simple.html.php');

}

Create Symfony View file

First of all, create a new folder named “phpgrid” in “app/Resources/views”. Secondly, create a view file named “simple.html.php”, or whatever view file name used in your Controller in the previous step.

Include the phpGrid config file.

1
2
$webDir = $this->container->getParameter('kernel.root_dir');
require_once($webDir ."/../web/phpGrid_Lite/conf.php");

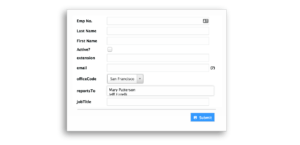
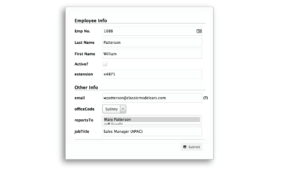
Load a simple datagrid from phpGrid sample database table “orders” (The sample database is located under examples/SampleDB)

1
2
$dg = new C_DataGrid("SELECT * FROM orders", "orderNumber", "orders");
$dg->display();

Congrats! You’ve just created your first datagrid in Symfony! Now visit “your_domain.com/phpgrid/simple” to see the datagrid.


Download complete demo files

The post phpGrid Symfony Integration appeared first on phpGrid.

Viewing all 107 articles
Browse latest View live